2007 Wardrobe Contest - Fleurs de la Mer, LauraLo
16 items
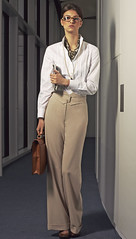
Combo 1
Combo 2
Combo 3
Combo 4
Combo 5
Combo 6
Combo7
Combo 8
Initial storyboard. As you will see, I changed many things compared to the initial plan, but stuck to the fabrics and colours chosen initially. It is very normal for me to keep changing my mind, I'm a Libra :) Well, all kidding apart, I do change my plans often when I sew. To sew well, I need an idea that challenges me and absorbs all my creative energy, transforming me into a little sewing maniac, therefore if I get such an idea, I tend to change my initial plan and give up other "less-inspiring" things.
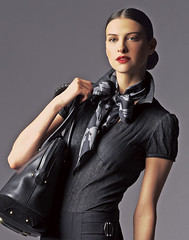
I've also changed the name of my wardrobe to "Fleurs de la Mer" - Flowers of the Sea, because of the flower motive that comes in two skirts and the jacket and because the colours make me think of the sea.
I made 7 tops (four needed for the contest and three extras - top 6 and top 7 do not go very well under the jacket, but at Anne's advice, I post them as extras, therefore they do not have to go with everything, 5 skirts (three needed for the contest and two extras), 1 pant (extra), 2 dresses and 1 jacket (counting as accessory).
Here they are:
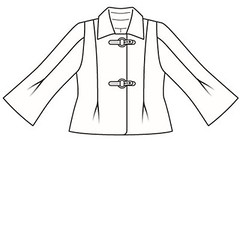
Jacket - white cotton with blue and lime green cotton/lycra knit flower appliques, satin bias bound patch pockets, bound collar
Top 1 - flowery viscose top, with trim at the bust line
Top 2 - a second flowery viscose top, with trim at hem
Top 3 - lime green cotton/lycra knit top, with "homemade" trim at neckline and bound armholes
Top 4 - aqua cotton/lycra knit top, with homemade trim at the bust line and dolman sleeve
Top 5 - aqua linen top, with homemade trim at the bust line and bound armholes
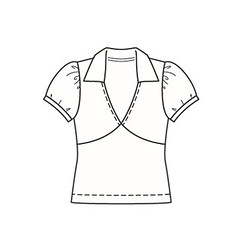
Top 6 - lime green cotton/lycra top, with knotted straps
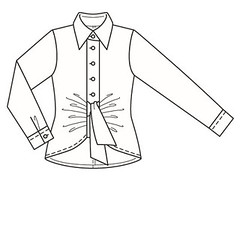
Top 7 - blue cotton/lycra top, with cross-stitch embellishing
Skirt 1 - A-line, white cotton with blue and lime green flower appliques and satin bias bound hemline
Skirt 2 - kiwi organza bias skirt, underlined with self-fabric
Skirt 3 - aqua satin bias skirt, with hand embroidery and sheer square sequins
Skirt 4 - kiwi stretch cotton batiste skirt, with homemade trim and satin bias binding at the hemline
Skirt 5 - aqua stretch cotton batiste skirt, with hem band and waistband in blue cotton satin and flower appliques. Underlined in self fabric.
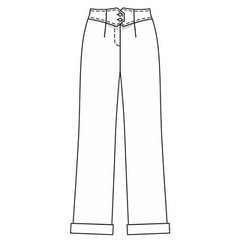
Pants - slouchy jeans in blue stretch denim
Dress 1 - mock wrap-up dress with bias skirt, in white linen/silk
Dress 2 - sleeveless Cosmo in white cotton/lycra with lime green waistband, ties, and neckline and armholes binding
I really enjoyed this contest, even if I change my mind a lot or get sidetracked, even if at the end I feel a bit bored of the same colours. But it keeps me disciplined and makes me accomplish things. If I would set myself the goal to sew a capsule wardrobe, I will probably get sidetracked a lot more and finish in 1 year. If finishing at all.
I've also discovered that I really enjoy writing reviews (maybe that's why my reviews keep getting longer, sorry if I am boring), I like sharing things with potential readers, I like the idea that what I know or discover might me helpful someday to somebody else. I've also made lots of friends here at PR and via my blog and I'm grateful to all the people who encouraged me, offered advice, suggestions and compliments. Not only this feedback is very rewarding, but it also makes me want to get better.
And thirdly, it seems I have two fears less after this contest: working with bias, especially sheer fabrics, and sewing jeans.
I'll be leaving for the seaside on the 3rd of August and guess what, I'm taking this entire wardrobe with me! I've already worn everything in this little wardrobe and I love and feel great in all the pieces. They do say something about my taste, about my lifestyle, they do say something about me... therefore I'm happy!